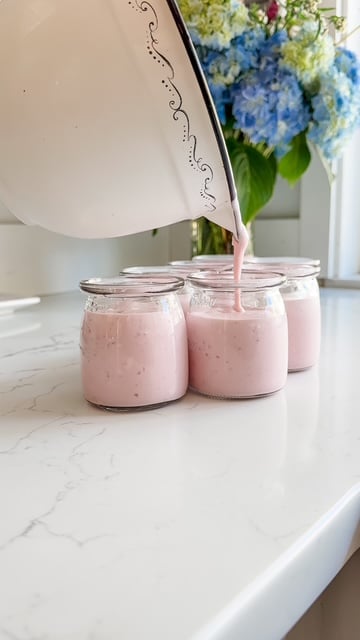
Scratch Made Mozzarella Cheese
🧀 How to Make Homemade Mozzarella Cheese (Perfect for From-Scratch Cooking & Homesteading)
How to Make Homemade Mozzarella | Easy Cheese for Homesteaders
Learn how to make mozzarella cheese at home with this step-by-step recipe—perfect for homesteaders and anyone learning to cook from scratch. Plus, how to turn it into homemade string cheese!
If you’re diving into from-scratch cooking or building a homesteading lifestyle, learning how to make homemade mozzarella cheese is one of the most rewarding and surprisingly simple skills you can master. Let me just say this, you haven’t lived until you have tasted fresh warm salted mozzarella straight out of the pot!!!
Aside from being absolutely delicious, it saves money (especially if your family eats a lot of cheese), but it also cuts down on plastic packaging, lets you control ingredients, and opens the door to fun DIY snack ideas—like making your own string cheese for the kids!
Let’s walk through exactly how to do it, step-by-step.
🧑🍳 Why Learn to Make Mozzarella from Scratch?
Mozzarella is one of the easiest cheeses to start with when you’re learning traditional cooking or homestead kitchen skills. It’s fast, forgiving, and doesn’t require aging or fancy molds.
Benefits of Making Mozzarella at Home:
- Quick: Ready in under 30 minutes
- Budget-Friendly: Far cheaper than store-bought cheese
- Natural: No preservatives or additives
- Kid-Friendly: Great for homemade string cheese or pizza topping
- Customizable: Add herbs or smoke it for variety
🛒 Ingredients & Supplies for Homemade Mozzarella
You’ll need just a few ingredients and some basic kitchen tools. Most are easy to find online or at natural food stores.
I highly recommend this mozzarella cheese making kit when you first start out so you don’t have to source the individual items. It comes with everything you need like rennet, citric acid, salt, and a thermometer, plus an informative booklet!! This is what I used when I first started.
🧂 Ingredients:
- 1 gallon of whole milk (not ultra-pasteurized; raw or low-temp pasteurized is best) Goat or Cows milk is perfect
- 1½ teaspoons citric acid, dissolved in ¼ cup cool water
- ¼ rennet tablet (or ¼ tsp liquid rennet), dissolved in ¼ cup cool water
- 1 tsp cheese salt (or kosher salt, optional)
🧰 Supplies:
- Large stainless steel pot
- Slotted spoon
- Thermometer
- Long knife or curd cutter
- Cheesecloth (optional)
- Microwave or hot water bath for stretching
🧀 Step-by-Step Instructions for Making Homemade Mozzarella
Step 1: Dissolve 1/4 rennet tablet in 1/4 cup cool water and set aside. Wrap remaining tablet in plastic and store in the freezer. Or alternately, if you have liquid rennet, mix 1/4 tsp with 1/4 cup cool water.
Step 2: Heat the Milk
Pour the milk into your pot. Slowly heat it to 90°F, stirring gently.
Step 3: Add Citric Acid
Stir in the dissolved citric acid. This helps the milk curdle properly.
Step 4: Add Rennet
Once the milk reaches 90°F, remove from heat and stir in the diluted rennet using an up-and-down motion for 30 seconds. Then stop stirring. Cover and let sit for 5–10 minutes until it forms a soft curd. When ready, the curd should look like custard with a clear separation between the curds and whey.
Step 5: Cut the Curd
Use a long knife that reaches to the bottom of the pot to slice the curd into a 1-inch grid pattern. This helps the whey separate. See Video
Step 6: Heat and Stir
Slowly heat the curds to 105°F, stirring gently to prevent matting. Then remove from heat and continue stirring for another 2–5 minutes.
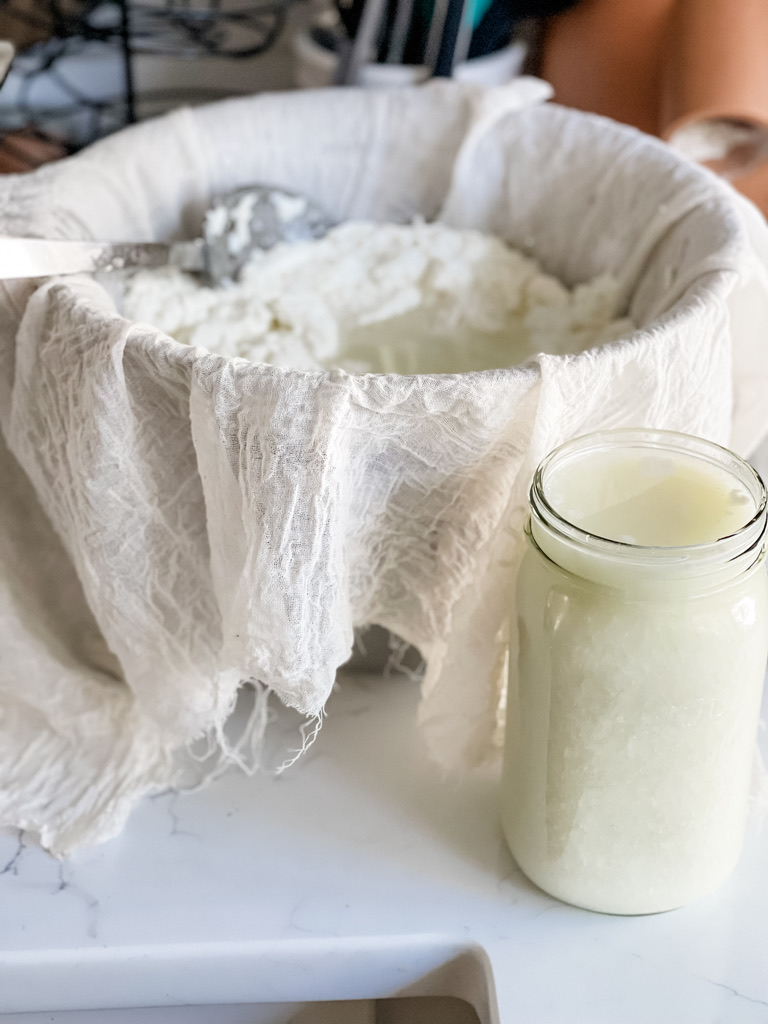
Step 7: Drain the Whey
Scoop the curds into a colander lined with cheesecloth. Let drain for 5 minutes. (Save the whey for baking, soup, or animal feed!)
Step 8: Water Bath Stretching
Hot water bath method:
Heat a pot of water to 185°F.
Ladle your curds into a colander, folding the curds gently as you drain off the whey.
Dip the curds in the colander into the hot water. After several times take a spoon and fold the curds until they start to become elastic and stretchable. This happens when the curd temperature reaches 135°F (You may want to do half the curds at a time in this step to ensure even heating).
When it is stretchable remove the curd from the liquid and pull like taffy. This stretching elongates the proteins. If it does not stretch easily, return it to the hot water for more heat
At this point you can add 1 tsp more or less salt and/or herbs and work it into the cheese. I sprinkle with salt and then stretch and fold to mix it in.
Stretch the cheese until smooth and shiny. Now we usually slice off a few pieces and eat it hot. Yum!
You can now form your cheese into a log, ball, braid, bite size morsels, or even make it into string cheese
When finished, submerge it in 50°F water to cool for 5 minutes and then in ice water for 15 minutes. This will cool it down and allow the cheese to hold its shape. This step is critical as it protects the silky texture and keeps it from becoming grainy.
Step 9: Storage
I like to vacuum seal my mozzarella. It keeps it freshest. But you can also wrap pin plastic wrap or place in tuper ware.
🧵 How to Make Homemade String Cheese
String cheese is just mozzarella pulled into thin, finger-width ropes. Once the cheese is fully stretched and smooth:
- Pull off palm-sized pieces.
- Stretch them into long, thin strands. Cut in desired snack sized length.
- Let them cool slightly
- Wrap individually in plastic, parchment or beeswax wraps and store in the fridge for up to a week.
Your kids will love helping shape them—and you’ll love the money you save on individually packaged snacks.
💰 How Homemade Cheese Saves You Money
Buying organic or specialty cheeses adds up quickly. One gallon of milk makes about 1 pound of mozzarella, which can cost $8–$12 in stores. If you have your own dairy animals, the cost is pennies. Even with store-bought milk, homemade cheese can cut your snack budget in half—especially if you’re making string cheese or pizza cheese weekly.
✅ Tips for Beginner Cheesemakers
- Always use non-ultra-pasteurized milk—the proteins are damaged in UHT milk.
- Rennet tablets stay fresh longer than liquid and are easier to store.
- Your first batch doesn’t have to be perfect—mozzarella is very forgiving.
- If your cheese isn’t stretching, it’s likely a temperature issue. Aim for 135°F during stretching.
🏡 From-Scratch Cooking That Fits a Homesteading Lifestyle
Whether you’re raising goats, shopping at a local dairy, or just learning to cook more traditionally, making mozzarella at home is a simple, satisfying skill that ties perfectly into the homesteading mindset. It’s a gateway to homemade pizzas, garden-fresh Caprese salads, and easy, packable school snacks.
📌 Final Thoughts: Homemade Mozzarella Is Easier Than You Think
You don’t need a cheesemaker’s degree to enjoy fresh, melty mozzarella straight from your own kitchen. With just a few ingredients and a little practice, you’ll be pulling perfect stretchy cheese in no time—and saving money while you’re at it.
Homesteaders, scratch-cookers, and snack-loving families—this one’s for you.
Keywords to Target for SEO:
- how to make mozzarella cheese
- homemade mozzarella recipe
- DIY string cheese
- homestead cooking skills
- cheese making for beginners
- from scratch snack ideas
- homemade cheese for kids
- budget-friendly dairy recipes
- how to make cheese from raw milk


Can you please advise how long it lasts once vacuumed sealed and your process? I have read a few things and I see some to freeze the mozzarella first? Help
Please
If you freeze it, you can make it last about 6 months. In the fridge probably 7-10 days.
I have goatmilk in the freezer. Is it ok to use that or does it need to be fresh?
I don’t think frozen goats milk would be good for this unforunately 🙁
Fresh is perfection!!
I cannot seem to find the mozzarella cheese making kit that you highly recommend, though it appears that the button should be clickable and would take us to the product page?
Also, in Step 5 Cut the Curd, it says “See Video”, but I cannot find that either? I am very interested in learning this process!
Hi Cindi, I think I fixed the issue. Please let me know if you can now see the video and links on your side.
Can fresh cows milk be used?
Yes! That would work just fine!