Canning and Fermenting at Home
Welcome to the world of home canning and fermenting, where the bounty of your garden or local farmer’s market can be savored all year round! This guide is designed to introduce you to the basics of canning and preserving, helping you to keep your favorite fruits, vegetables, and even meats in safe and delicious ways all year long. I really prefer storing our food in glass, which can be problematic when freezing, so canning is my favorite option for storing many things like pickled veggies, apple sauce, jams and preserves etc.

The Art of Canning
Canning is a method of food preservation that involves processing food in sealed containers to extend its shelf life. This process keeps food safe from bacteria, yeast, and molds by creating a vacuum seal in a jar, which prevents spoilage. I was so Intimidated by the idea of canning when I first started! It seemed scary, complex, and risky if I did it wrong. But I will never forget the feeling I had after canning my first batch of pickles, thinking “Oh my gosh, why did that seem so intimidating?!” Its really extremely easy, and as long as you follow proven recipes and some simple steps, it’s completely safe!!
Water bath canning vs. pressure canning
There are two main methods of canning: water bath canning and pressure canning. Water bath canning is great for high-acid foods like fruits, tomatoes, and pickles, while pressure canning is required for low-acid foods like most vegetables, meats, and poultry. Water bath canning is a bit easier and is generally a good place for beginners to start.
Equipment you will need:
A Canner: For water bath canning you can use a canner like the one linked here that heats the water for you. We use this one because our stove has a hard time maintaining a rolling boil with a large stockpot, which is important for canning. However a large stock pot works well if your stove can do it!! Just make sure that it’s tall enough to cover whatever size jars you end up using with at least 2 inches of water above the top of the jars to ensure a proper seal. For pressure canning you need a different type of canner called a pressure canner like this one here.
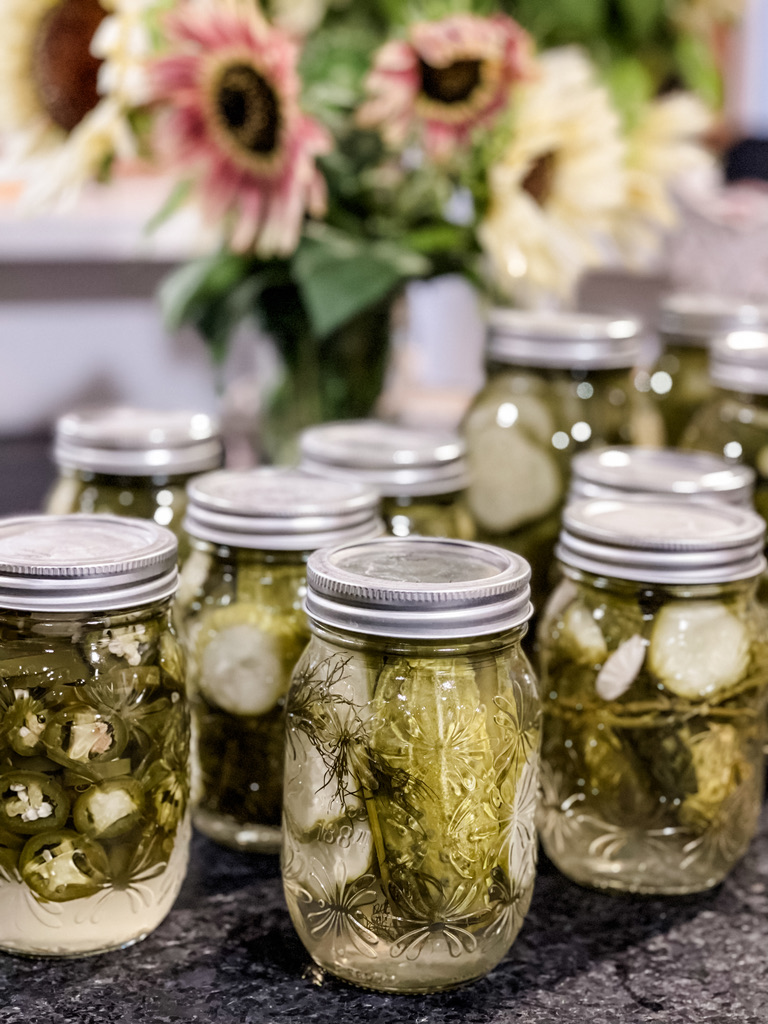
Jars: Mason jars are a homestead staple, and seem to be in a constant rotation around here! They are so multi purpose, and can be used over and over again (and we do!). Just make sure that you are using jars for canning that have not been used roughly and might not hold up to the stress of canning. There is nothing worse than getting everything in the jars ready for the pot and then having the jar crack when you lower it into the water!! Mason jars come in many different sizes and shapes. There are two different types, regular mouth and wide mouth. Wide mouth are better for freezing in, and regular mouth are better for canning with in my opinion. I have had the seals buckle a few times with wide mouth lids but never with regular mouth. Choose the right size jar for whatever recipe you plan to make, based off of how you normally consume products. If you are making jam and your family normally uses a jar a week, then a pint jar is probably a good fit. But if you use one jar every other month, you might want to go with a smaller 4 oz jar so that it gets used up more quickly. Keep in mind the shelf life changes once the seal is broken.
Lids may be reused for storage but not for canning. Once you have used them once for canning, the seal will no longer work properly for subsequent canning. Make sure you always use fresh lids for canning.
Jar lifter, funnel, and headspace measuring device are all important to have on hand for this process. This kit comes with everything you need and I recommend it to everyone. This also makes a great gift for fellow friends and relatives that might want to get into canning 🙂
Getting Started with Canning
- Pull out your canner: Ready whichever canning method you have chosen. Fill with water and bring to a boil. Keep in mind the fact that the water level will rise as you add the jars, so leave some room at the top. As previously mentioned, you want the water to cover the tops of the jars by 1-2 inches in order for the seals to work properly.
- Gather Your Supplies: Make sure you have all of the needed supplies before you get started: You’ll need jars, lids, a canner (or large pot for water bath canning), jar lifters, a funnel, and a ladle.
- Make sure your jars and lids are sterilized.
- Prepare Your Food: Start with fresh, high-quality produce. Wash and cut your food as required. Once you put hot liquid into the jars you want the process to move along quickly. Only fill as many jars with hot liquid as you can process in your canner at a time. For instance, if you can fit 8 jars in your canner, then fill and prepare jars in batches of 8 as you process.
- Fill Your Jars: Follow a tested recipe to fill your jars, leaving appropriate headspace. Keep your lids in a small pot of hot water so that they are hot as you place them on your jars. Wipe the rims clean, place the lids on, and tighten the bands.
- Process Your Jars: Place your jars in the canner and process them for the time specified in your recipe.
- Cool and Store: Once processed, remove the jars from the pot and set on the counter without disturbing them for 12 hours to let the seals set. As they finish sealing, they will each make a “popping” sounds one by one, this is normal, Don’t let it worry you. Once they have settled they can be moved to your designated storage area like a pantry or cupboard.

The World of Fermentation
Fermentation is a process where microorganisms like yeast and bacteria convert carbs into alcohol or acids. This not only preserves the food but also creates beneficial enzymes, b-vitamins, and probiotics.
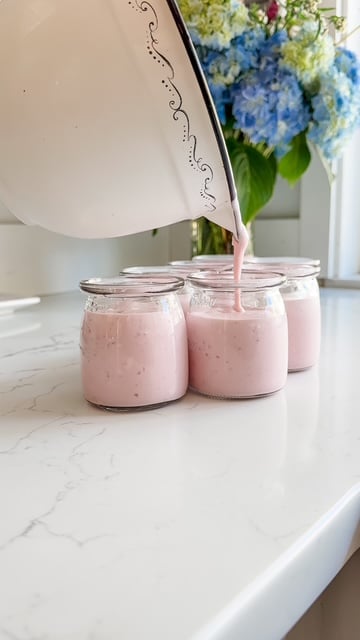
Click here for our Homemade Yogurt Recipe!!
Beginning Your Fermentation Journey
- Choose Your Project: Some fun and Popular fermentation projects include making sauerkraut, kimchi, yogurt, and kombucha. This Kombucha kit makes it easy to get started!!
- Simple Equipment: Most fermentation projects require basic kitchen tools, along with jars or fermentation crocks.
- Create the Right Environment: Most fermented foods require a specific temperature range and time to develop the right flavors and textures.
- Monitor Your Ferment: Keep an eye on your project, and taste it at different stages to learn how the flavors develop.
Benefits of Canning and Fermenting
- Preserves Produce: Extend the life of your harvest or market bounty.
- Enhances Flavor: Both processes can enhance the natural flavors of food.
- Health Benefits: Fermented foods are rich in probiotics, which are great for gut health.
- Reduces Food Waste: Preserving food reduces waste and can save money.

Safety First
When canning and fermenting at home, it’s crucial to follow recipes and guidelines precisely to ensure the food is preserved safely. Improper techniques can lead to food spoilage or, in severe cases, food borne illnesses.
Conclusion
Canning and fermenting are not just food preservation methods; they are gateways to a world of culinary creativity and self-sufficiency. They connect us to the past, teach patience, and reward us with flavors that can’t be found in store-bought foods. Whether you’re a novice or a seasoned preserver, the journey of canning and fermenting at home is sure to be a rewarding one. So why wait? Start exploring the delicious possibilities today!