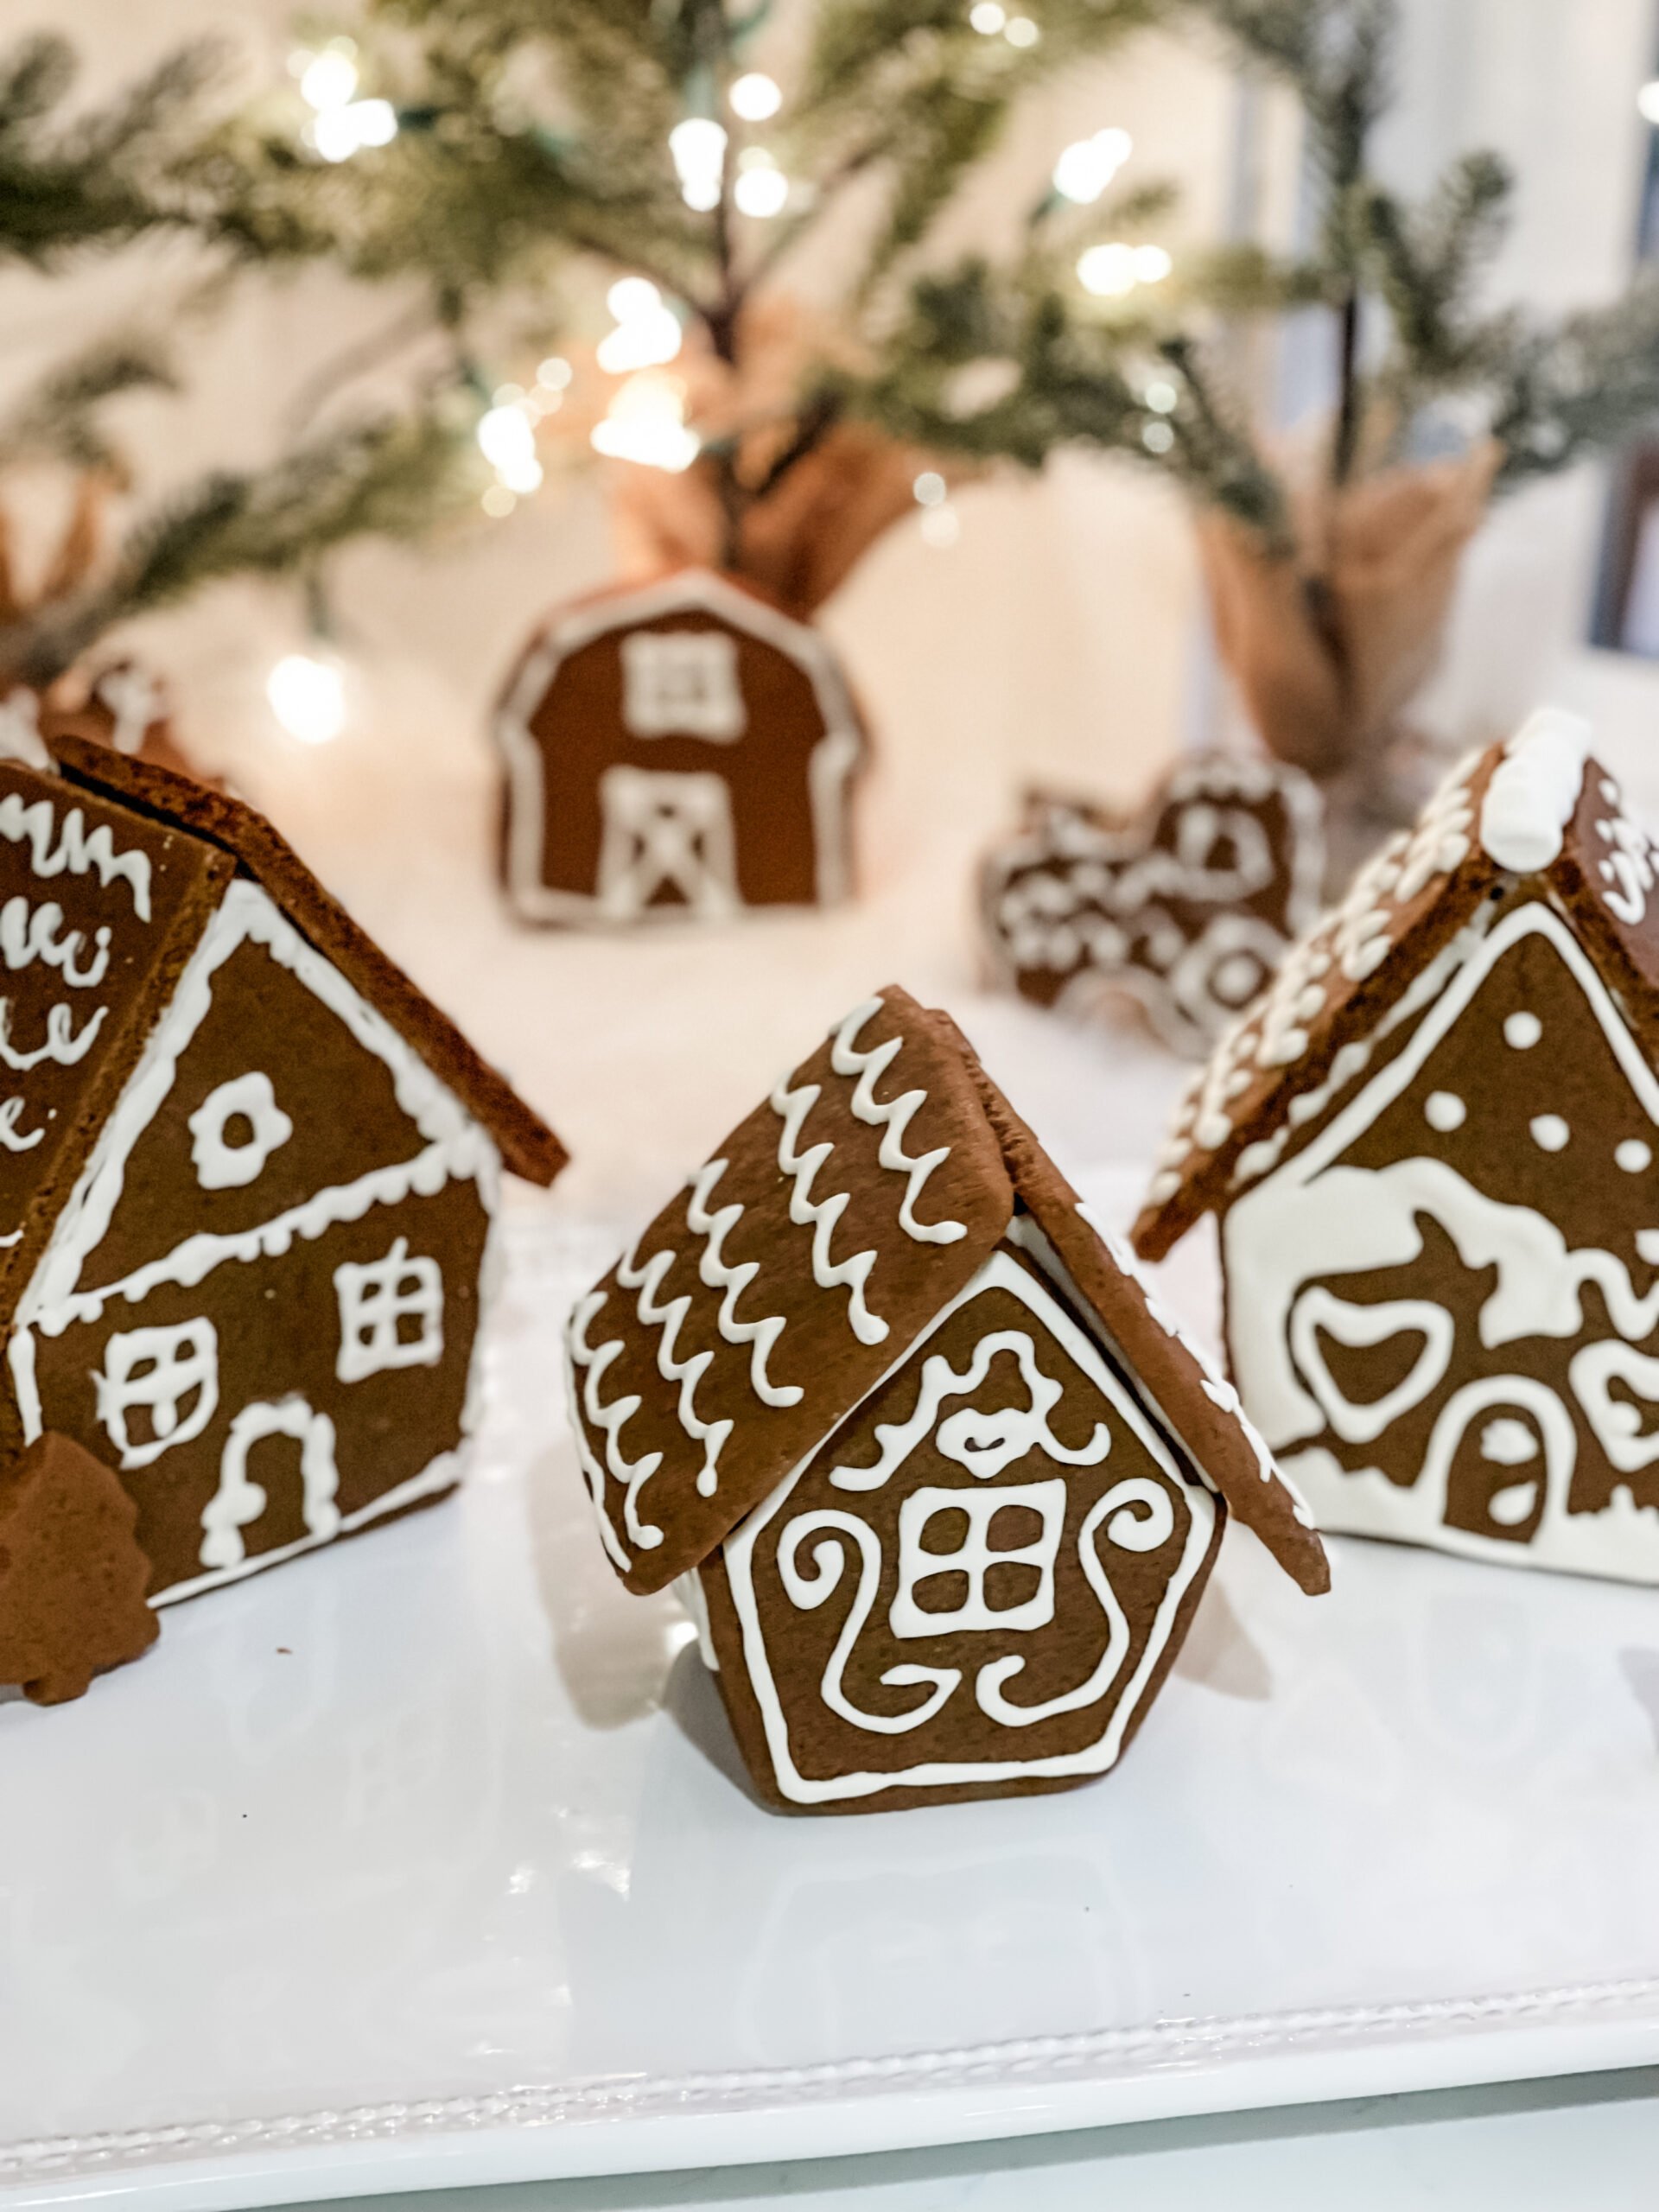
Homemade (edible) Gingerbread Houses
A Sweet Holiday Tradition to Build, Create & Share. Templates included
To be honest, throwing away the premade Gingerbread houses every year bugged me! I had wanted to do this for a long time, finally dove in last year, and let me tell you there’s something undeniably magical about building a homemade gingerbread house — the smell of warm spices, the sound of kids sneaking candies, the cozy creative chaos that only happens during the holidays! Plus, they are edible!!
Whether you’re making a classic cottage, a whimsical candy-covered cabin, or a full farm (my personal favorite), this method will give you sturdy pieces, clean cuts, and a house that actually stays standing.
This is the exact process I use — simple, reliable, and perfect for family traditions, cookie parties, or gifting adorable mini houses.
Let’s build!

1. Make the Dough
Use The World’s Best Gingerbread Cookie recipe linked here. This dough is perfect for gingerbread houses because:
- It rolls out cleanly
- It cuts beautifully
- It bakes flat and sturdy
- It doesn’t puff or warp too much
Pivot Farm Pro Tip:
Make the dough the night before.
Chilled dough rolls cleaner, cuts sharper, and holds its shape like a dream.
2. Print & Cut Your Templates
Use the gingerbread house templates provided in the links below. They include:
- Front of house
- Back of house
- Two side walls
- Two roof panels
- Optional chimney pieces
- Optional doors & windows
Cut out each template piece so they’re ready to trace onto your dough.
3. Roll Out the Dough
Lightly flour your surface and roll the dough to ¼-inch thickness.
Thinner pieces crack. Thicker pieces get too heavy.
Once rolled, lift the entire sheet of dough onto a piece of parchment paper.
Arrange your template pieces on the dough, leaving about 2 inches between each shape so you can cut clean edges.
Using a sharp knife or a pizza cutter, cut around each template right on the parchment, then gently remove the extra dough, not the pieces you cut.
This keeps the pieces perfectly shaped and prevents distortion from moving them.
Slide the parchment onto a cookie sheet and place in the freezer for about 15 min or the fridge for 30 min to prevent spreading.
4. Bake the House Pieces
Bake at 350°F for 10–14 minutes, depending on size:
- Smaller pieces bake faster
- Roof and wall panels take longer
Let all pieces cool completely on a flat surface.
Important:
Don’t rush cooling — warm gingerbread bends and breaks.
If you can wait until the next day to assemble, even better!
5. Make Your “Glue” — Royal Icing
This is the magic that holds your house together.
Simple Royal Icing Recipe
- 3 cups powdered sugar
- 2 egg whites
or 3 tbsp meringue powder + ¼ cup water - ½ tsp vanilla
Beat until thick, glossy, and pipeable.
Add more powdered sugar if it feels too thin. Thicker is better for holding the house together.
Pivot Farm Tip:
Decorate your walls and roof before assembling. Let dry.
Piping details on a flat surface is 100x easier than decorating a vertical wall.
6. Assemble Your Gingerbread House
Start by attaching the front, back, and side walls.
Pipe a generous bead of royal icing along the edges and hold each piece in place for 10–20 seconds.
Let this frame dry for 15–20 minutes before adding the roof.
Pivot Farm Tip:
Use mugs, mason jars, or canned goods to prop the walls up while they set.
Game changer.
Once the walls feel sturdy, attach the roof panels with another thick line of icing. Let dry completely.
7. Decorate!
Now the fun begins — this is where your creativity shines.
Decoration ideas:
- Dust with powdered sugar for “snow”
- Pretzels for fences or log cabin walls
- Gumdrops and peppermints
- Icing icicles on the rooftop
- Chocolate candies for pathways
- Rosemary sprigs as tiny pine trees
- Mini gingerbread men in the yard
- Crushed candy for shingles
Let everything dry for at least 1 hour before moving.
Extra Tips for Stunning Gingerbread Houses
- Bake pieces a day ahead for maximum firmness
- Thicker icing for construction, thinner icing for decorating
- Build on a base like a cake board, cutting board, or platter
- Make multiple houses — perfect for kids or holiday parties
- Store finished houses uncovered so the gingerbread stays crisp
From My Farmhouse Kitchen
Building gingerbread houses is one of my favorite holiday traditions — simple, hands-on, and always filled with laughter (and a few stolen gumdrops). Whether you’re crafting with kids, hosting a decorating party, or making something magical for your holiday table, these homemade gingerbread houses are truly something special.
World’s Best Gingerbread Cookies!
Ingredients
Method
- Cream the butter + sugars
- In a large mixer bowl, cream the softened butter, brown sugar, honey, and molasses until smooth and fluffy.
- Add the eggs + spices
- Mix in the eggs, ginger, cinnamon, allspice, baking soda, and flour.
- Start on low speed and scrape the bowl as needed until everything is fully combined (about 1–2 minutes).
- Chill the dough
- Cover and refrigerate for 2 hours.
- Tip: To speed cooling, divide the dough into 2–3 sections, flatten each into a 1–inch thick slab inside a zip-top bag, and chill.
- Take out one slab at a time when you’re ready to roll.
- Preheat the oven
- Heat your oven to 350°F and line baking sheets with parchment paper.
- Roll + cut the cookies
- On a lightly floured surface, roll one portion of dough at a time to ¼-inch thickness.
- Use 3-inch cookie cutters and place cookies 1 inch apart on prepared sheets.
- Bake
- Bake for 10 minutes, or until the edges are lightly golden.
- Cool completely before decorating.
- 🍬 Royal Icing for Gingerbread Cookies
- Make the icing
- In a small mixer bowl, beat the egg whites + powdered sugar on low speed.
- Add milk, a tiny bit at a time, until it reaches your desired piping consistency.
- Add natural food coloring if you want colorful designs.
- Decorate!
- Pipe, outline, swirl, dip — have fun with it!
- The icing dries firm, making these cookies perfect for gifting or packaging.
Did You Make This Recipe?
Let us know what you think?